B's birthday is my favorite day of the year...because it means he is, once again, as old as I am! Can't wait to celebrate!
Showing posts with label Sweets. Show all posts
Wednesday, October 6, 2010
Happy Birthday!
B's birthday is my favorite day of the year...because it means he is, once again, as old as I am! Can't wait to celebrate!
Saturday, October 2, 2010
Fortune Cookie Factory
If you google "free things to do in the Bay Area," chances are that a tour of a fortune cookie factory will pop up at the top of the list. Always game for free AND food-related activities, I hopped on the chance to find out just how they got those hidden messages tucked safely inside the folds of the wafer.
Paranoid as I am about arriving at a place after hours or on an off day, I called ahead to inquire about the day's schedule. The man on the phone was clearly not a native English speaker; he merely kept repeating, "We open till 7 pm. You come any time." "Ok," I thought to myself, "This is kind of bizarre, but what do I have to lose?"

Several BART stops later, I found myself wandering through the brightly colored, lanterned maze that is Chinatown in San Francisco. 9-5ers raced through the streets around me as I desperately tried to keep stride with the New Yorker that accompanied me on this adventure. Guided by her I-phone (god knows I don't have one), we turned down an alley that looked more like a zone for illegal abortions than fresh baked delights.

And then we saw it. On the right hand sign was a miniature sign indicating that we had indeed arrived at the Golden Gate Fortune Cookie Factory. In an airy, open storefront the size of a postage stamp, we were immediately greeted by the three employees and entire operation!

The same man who answered the phone stood by the doorway offering the rejected cookies as a sample of their wares and ensuring that anyone with a camera paid the requisite 50 cents for a photo of his ladies. This included the Floridian man, armed with a video camera, who kept referring to the edibles as "egg rolls" while filming!

Behind him, two women worked the assembly lines, making sure the batter was loaded into the dispenser, discarding cookies that didn't meet their exacting standards (boy, there seemed to be a lot of them), and carefully plucking off the prime tuiles from the hot iron press, filling them with a message, and folding them to fully envelope the surprise. Together, these two women made thousands of fortune cookies everyday, and I am pretty sure that they were all the nuts and bolts of the operation.

Satisfied with our discovery, we paid for a bag of adult fortune cookies and went on our way. A word of advice: don't spring the extra 50 cents (or whatever it was) for the naughty notes - out of about 10 that I ate, 9 were the same nonsensical and non-naughty message!
Paranoid as I am about arriving at a place after hours or on an off day, I called ahead to inquire about the day's schedule. The man on the phone was clearly not a native English speaker; he merely kept repeating, "We open till 7 pm. You come any time." "Ok," I thought to myself, "This is kind of bizarre, but what do I have to lose?"
Several BART stops later, I found myself wandering through the brightly colored, lanterned maze that is Chinatown in San Francisco. 9-5ers raced through the streets around me as I desperately tried to keep stride with the New Yorker that accompanied me on this adventure. Guided by her I-phone (god knows I don't have one), we turned down an alley that looked more like a zone for illegal abortions than fresh baked delights.
And then we saw it. On the right hand sign was a miniature sign indicating that we had indeed arrived at the Golden Gate Fortune Cookie Factory. In an airy, open storefront the size of a postage stamp, we were immediately greeted by the three employees and entire operation!
The same man who answered the phone stood by the doorway offering the rejected cookies as a sample of their wares and ensuring that anyone with a camera paid the requisite 50 cents for a photo of his ladies. This included the Floridian man, armed with a video camera, who kept referring to the edibles as "egg rolls" while filming!
Behind him, two women worked the assembly lines, making sure the batter was loaded into the dispenser, discarding cookies that didn't meet their exacting standards (boy, there seemed to be a lot of them), and carefully plucking off the prime tuiles from the hot iron press, filling them with a message, and folding them to fully envelope the surprise. Together, these two women made thousands of fortune cookies everyday, and I am pretty sure that they were all the nuts and bolts of the operation.
Satisfied with our discovery, we paid for a bag of adult fortune cookies and went on our way. A word of advice: don't spring the extra 50 cents (or whatever it was) for the naughty notes - out of about 10 that I ate, 9 were the same nonsensical and non-naughty message!
Wednesday, September 29, 2010
Whole Wheat Pancakes with Apple Compote
Whole-wheat pancakes with apple compote
September 29, 2010
Boston Globe
Serves 4
Whole-wheat pancakes, made with beaten egg whites, are hearty and nutty, a good match for an apple compote with walnuts, raisins, maple syrup, and warm spices. Double the compote recipe to keep on hand for other breakfasts or to set beside pork chops at supper.
COMPOTE
4 baking apples (see Page 19), peeled, seeded, and chopped
1/4 cup chopped walnuts
1/4 cup golden raisins
1 tablespoon butter
1/4 cup maple syrup
1/4 cup water
Juice of 1 lemon
Pinch of ground cinnamon
Pinch of ground nutmeg
Pinch of salt
1. In a heavy saucepan over high heat, combine apples, walnuts, raisins, butter, maple syrup, water, lemon, cinnamon, nutmeg, and salt.
2. Bring liquid to a boil, lower the heat, and cook over medium-high heat, stirring often, for 10 minutes or until apples soften.
PANCAKES
4 eggs, separated
1 1/2 cups milk
1/4 cup sour cream
1/4 cup sugar
2 tablespoons canola oil
1/2 teaspoon salt
2 teaspoons baking powder
1/2 teaspoon baking soda
1 1/2 cups whole-wheat flour
1 1/2 cups all-purpose flour
Canola oil (for the pan)
1/2 cup heavy cream, softly whipped (optional)
1. In a bowl, whisk the egg whites until they hold stiff peaks; set aside.
2. In another large bowl, stir together yolks, milk, sour cream, sugar, canola oil, and salt. With a rubber spatula, fold in the baking powder, baking soda, and whole-wheat and all-purpose flours. Fold in the whites.
3. Heat a large nonstick skillet over medium heat. Add a few drops of canola oil and swirl it around in the pan.
4. Ladle the batter by the 1/4 cupfuls, adding about 4 to the pan. Cook for 2 to 3 minutes or until bubbles form on the tops of the pancakes. Turn and cook 2 to 3 minutes more or until golden on the undersides. Wipe pan with oil between batches.
5. Serve pancakes with apple compote and whipped cream, if you like.
Apple Clafoutis
Apple clafoutis
September 29, 2010
Boston Globe
Serves 6
Traditionally made in the Limousin region of France with sour cherries, this rustic dessert offers a platform to showcase seasonal fruit. The mixture is similar to a crepe or pancake batter. Let it rest and it will develop flavor. Saute apples in butter and sugar, then combine the fruit and batter in a baking dish. As it cooks, it turns into a souffle with a golden crust, which falls as it cools (it’s supposed to) and tastes almost creamy.
BATTER
2 eggs plus 2 extra yolks
1/2 cup sugar
Pinch of salt
2 teaspoons vanilla extract
1/2 cup flour
3/4 cup milk
1/2 cup heavy cream
1. In a blender, work the eggs, extra yolks, sugar, salt, and vanilla for 30 seconds. Add the flour and blend until smooth.
2. With the machine running, pour in milk and cream. When the mixture is smooth, set aside for 30 minutes.
APPLES
2 tablespoons butter
4 baking apples, peeled, seeded, and chopped
2 tablespoons granulated sugar
Salt, to taste
2 tablespoons brandy
Butter (for the dish)
1 teaspoon granulated sugar mixed with 1/2 teaspoon ground cinnamon
Confectioners’ sugar (for sprinkling)
1. In a large skillet over medium-high heat, heat the butter. Add the apples, 2 tablespoons granulated sugar, and salt. Cook, stirring often, for 5 minutes, or until apples are tender. Remove pan from heat, and add brandy. Return pan to heat, and cook for 2 minutes.
2. Transfer the apples to a plate; leave to cool.
3. Set the oven at 350 degrees. Butter a deep 9-inch baking dish.
4. Lay the apples in the dish. Cover with batter. Sprinkle with the cinnamon-sugar mixture.
5. Bake for 35 to 40 minutes, or until the mixture is puffed and golden, and a knife inserted into the center comes out clean.
6. Cool on a wire rack. Sprinkle with confectioners’ sugar.
Honey Caramel Apple Dip
Honey-caramel apple dip
Boston Globe
September 29, 2010
Serves 6
You may have noticed individual packs of caramel sauce lining produce shelves for dipping apples. It’s easy enough to make your own. You need a candy thermometer and a large saucepan (the steps are simple, but working with sugar is precise). Use caution with children around as caramel reaches extremely hot temperatures and crawls high up the sides of the pot. For added fun, set up a dipping bar with chocolate chips, chopped nuts, and red hot cinnamon candies. Skip the stick.
1 1/2 cups plus 2 tablespoons heavy cream
1/2 teaspoon salt
1 cup honey
6 apples, cored and cut into wedges
1. In a large, heavy bottom saucepan, heat 1 1/2 cups of the cream and salt over high heat just until small bubbles begin to form on the surface (just before a simmer).
2. Stir in the honey and bring to a boil. Let the mixture bubble steadily, stirring often with a wooden spoon, for 10 minutes or until a candy thermometer registers 240 degrees. Carefully remove saucepan from the heat.
3. In a small saucepan, heat the remaining 2 tablespoons cream. Stir warm cream into hot caramel.
4. Transfer caramel to a heatproof bowl. Set aside to cool completely. Serve at room temperature with apple wedges.
Sunday, August 15, 2010
Top Chef Class

As many of you already know, I am teaching a few classes at Celsius & Beyond. This summer camp is more specifically called Top Chef. The kids range in age from 6 - 12. My lessons focus on fermentation and a few other processes of country cooking such as emulsification. In previous posts, I have laid out some of the recipes we have been working on: gazpacho, soft pretzels, & homemade butter.

Of course, the kids' choice favorite is always the cinnamon rolls. How can you resist that smell? With only a minimum amount of guidance, they cranked out some really gorgeous buns!

Feel free to try this at home - if the little guys can do it, so can you!
Cinnamon Rolls
Yield 12
6 ½ tablespoons sugar
1 teaspoon salt
5 ½ tablespoons butter
1 egg, beaten
Zest of 1 lemon
3 ½ cups flour (you may need to add extra flour if the dough seems very wet)
2 teaspoons instant yeast
1 ¼ cups buttermilk
1 cup water
6 ½ tablespoons sugar
1 ½ tablespoons ground cinnamon
4 cups powdered sugar
6 tablespoons water
1. Cream together sugar, salt, and butter in the bowl of an electric mixer fitted with a paddle (on medium-high speed).
2. Scrape down sides of bowl. Mix in egg and lemon zest. Scrape down again.
3. Add flour, yeast, buttermilk, and water. Mix on low speed until dough begins to form a ball. Switch to dough hook. Mix on medium speed for 10 minutes.
4. Place the dough in an oiled bowl. Cover with plastic wrap. Rest for 2 hours or until dough is doubled in size.
5. Transfer the dough to a lightly floured counter. Roll the dough into a rectangle that is 12 inches by 14 inches.
6. In a small bowl, mix together cinnamon and sugar. Sprinkle the cinnamon sugar onto the dough. Roll the dough into a cigar-shaped log.
7. Using a serrated knife, cut the log into 12 pieces.
8. Transfer the pieces to a baking sheet lined with parchment paper.
9. Proof at room temperature for 60 minutes, or until doubled in size. Set the oven at 350 degrees.
10. Bake the cinnamon rolls for 20-30 minutes, or until golden. Cool for 5 minutes.
11. In a small bowl, whisk powdered sugar with water to make a glaze. Brush each roll with glaze. Serve warm.
Thursday, August 12, 2010
Sand Torte

This elegant recipe makes the perfect dessert when you are in the mood to indulge but know that you have to squeeze into a bathing suit the next day. Light as a feather, the recipe was originally published in the July 1977 issue of Gourmet magazine. The ground almonds give the cake a somewhat grainy texture - hence the name "Sand Torte". It is a classic in our family as was the tradition of reading Gourmet. Even though the magazine is no longer in publication, we will continue to cook from its many phenomenal recipes. (Thanks to my broski for sharing these photos with us!)
3/4 cup flour
1/2 cup blanched almonds
4 eggs
2 yolks
1/2 cup sugar
6 tablespoons clarified butter
1 teaspoon vanilla extract
1/2 teaspoon lemon zest
Powdered sugar, for sprinkling
1. Set the oven at 350 degrees. In a skillet over medium heat, lightly toast almonds. Transfer to a food processor and pulse until finely ground.
2. Sift flour and blanched almonds together and set aside.
3. In the bowl of an electric mixer, combine eggs, yolks, and sugar. Set the bowl over a saucepan containing 2 inches of hot but not boiling water. Stir occasionally until it is lukewarm.
4. Transfer the bowl to the machine, and whip on medium high speed for 10 minutes, or until it is light and tripled in volume.
5. Sift in the flour mixture, about 1/4 cup at a time, folding gently.
6. Gently fold in clarified butter, vanilla, and lemon zest one tablespoon at a time.
7. Pour batter into a buttered and floured 1 1/2 quart kugelhupf pan (or a bundt pan).
8. Bake 35-40 minutes, or until a toothpick is inserted into the center and comes out clean.
9. Cool on a wire rack for 10 minutes. Invert onto a plate. Sprinkle with powdered sugar.
Wednesday, July 14, 2010
Blueberry Cake
From today's Boston Globe... Lisa's Cake, My Photos...

Blueberry buttermilk tea cake
By Lisa Yockelson, Globe Correspondent | July 14, 2010
Makes one 9-inch loaf
Big handfuls of fresh blueberries belong in a buttery cake, tender with buttermilk. The dark blue rounds float in this vanilla-scented batter and create juicy pockets of flavor. Their taste seems to concentrate during baking. When blues are fresh and plump, with a beautiful silvery sheen, the little rounds retain their shape and offer a mosaic in each slice. On this cake, the finish is a simple dusting of confectioners’ sugar, but many loaves benefit from a glaze. To make one, beat 2 tablespoons milk and 1 teaspoon vanilla into 1 cup confectioners’ sugar just until smooth. Once the loaf is cool, spoon the glaze over it and let it stand until firm. A bowl of whipped cream might seem too extravagant for this loaf. Go ahead and beat cream into clouds. Summer blues only come around once a year.

Butter (for the pan)
Flour (for the pan)
2 1/4 cups flour
1 teaspoon baking powder
1/4 teaspoon baking soda
1/4 teaspoon salt
3/4 cup fresh blueberries, picked over
8 tablespoons (1 stick) unsalted butter, at room temperature
1 cup granulated sugar
2 eggs
2 teaspoons vanilla extract
3/4 cup buttermilk
Confectioners’ sugar (for sprinkling)

1. Set the oven at 350 degrees. Butter a 9-by-5-by-3-inch loaf pan. Dust the pan with flour, tapping out the excess.
2. In a bowl, whisk the flour, baking powder, baking soda, and salt to blend them.
3. In another bowl, toss the blueberries with 1 teaspoon of the flour mixture.
4. In an electric mixer at medium speed, beat the butter for 2 minutes. Add the sugar in two additions, beating for 1 minute after each. Blend in the eggs, one at a time, followed by the vanilla.
5. With the mixer set on low speed, beat in half of the flour mixture, then the buttermilk, then the remaining flour mixture. Scrape down the sides of the bowl with a rubber spatula once or twice.
6. Remove the bowl from the mixer stand. With a large rubber spatula fold in the blueberries and any excess flour in the bowl.
7. Spoon the batter into the loaf pan, mounding it slightly in the center. Bake the cake for 55 to 60 minutes or until a skewer inserted into the middle of the cake is clean when withdrawn.
8. Set the cake on a wire rack to cool for 10 minutes. Turn the cake out of the pan and return the cake to the rack to cool. Dust the top with confectioners’ sugar. Cut into slices with a serrated knife.
Lisa Yockelson
Blueberry buttermilk tea cake
By Lisa Yockelson, Globe Correspondent | July 14, 2010
Makes one 9-inch loaf
Big handfuls of fresh blueberries belong in a buttery cake, tender with buttermilk. The dark blue rounds float in this vanilla-scented batter and create juicy pockets of flavor. Their taste seems to concentrate during baking. When blues are fresh and plump, with a beautiful silvery sheen, the little rounds retain their shape and offer a mosaic in each slice. On this cake, the finish is a simple dusting of confectioners’ sugar, but many loaves benefit from a glaze. To make one, beat 2 tablespoons milk and 1 teaspoon vanilla into 1 cup confectioners’ sugar just until smooth. Once the loaf is cool, spoon the glaze over it and let it stand until firm. A bowl of whipped cream might seem too extravagant for this loaf. Go ahead and beat cream into clouds. Summer blues only come around once a year.
Butter (for the pan)
Flour (for the pan)
2 1/4 cups flour
1 teaspoon baking powder
1/4 teaspoon baking soda
1/4 teaspoon salt
3/4 cup fresh blueberries, picked over
8 tablespoons (1 stick) unsalted butter, at room temperature
1 cup granulated sugar
2 eggs
2 teaspoons vanilla extract
3/4 cup buttermilk
Confectioners’ sugar (for sprinkling)
1. Set the oven at 350 degrees. Butter a 9-by-5-by-3-inch loaf pan. Dust the pan with flour, tapping out the excess.
2. In a bowl, whisk the flour, baking powder, baking soda, and salt to blend them.
3. In another bowl, toss the blueberries with 1 teaspoon of the flour mixture.
4. In an electric mixer at medium speed, beat the butter for 2 minutes. Add the sugar in two additions, beating for 1 minute after each. Blend in the eggs, one at a time, followed by the vanilla.
5. With the mixer set on low speed, beat in half of the flour mixture, then the buttermilk, then the remaining flour mixture. Scrape down the sides of the bowl with a rubber spatula once or twice.
6. Remove the bowl from the mixer stand. With a large rubber spatula fold in the blueberries and any excess flour in the bowl.
7. Spoon the batter into the loaf pan, mounding it slightly in the center. Bake the cake for 55 to 60 minutes or until a skewer inserted into the middle of the cake is clean when withdrawn.
8. Set the cake on a wire rack to cool for 10 minutes. Turn the cake out of the pan and return the cake to the rack to cool. Dust the top with confectioners’ sugar. Cut into slices with a serrated knife.
Lisa Yockelson
Wednesday, July 7, 2010
Cherry Pie
Cherry pie
From The Boston Globe
July 7, 2010
Makes one 9-inch pie
Two Fat Cats Bakery in Portland, Maine, uses sour cherries for this classic, but the season is very short. You can use sour cherries from a jar, but with markets full of fresh cherries, it seems a shame to get fruit from a jar. This version uses sweet cherries with both cornstarch and tapioca to thicken the red juices.
PASTRY
2 1/2 cups flour
1 tablespoon sugar
1 teaspoon salt
3/4 cup (12 tablespoons) cold unsalted butter, cut into large chunks
7 tablespoons cold shortening
1/3 cup ice water, or more if necessary
Flour (for sprinkling)
1. In food processor, pulse the flour, sugar, and salt just to sift them.
2. Add the butter and shortening and pulse until the texture has pea-sized chunks of butter still intact.
3. Sprinkle 1/3 cup water over the mixture and pulse until the mixture forms large clumps. Do not let the mixture come together to form a dough. Add more water, 1 tablespoon at a time, if necessary, to form clumps.
4. Turn the clumps out onto a lightly floured counter and shape gently to form a dough. Divide it in half. Shape each into a disk. Wrap separately in foil and refrigerate for 30 minutes.
5. Let the dough sit at room temperature about 5 minutes before rolling.
6. On a lightly floured counter, roll 1 disk of dough to an 11-inch round. Lift it onto the rolling pin and ease it into the pie pan. Refrigerate the pan.
7. Roll out the other disk of dough to a 10-inch round. Lift it onto the rolling pin and ease it onto a baking sheet. Refrigerate for 20 minutes.
FILLING
2 3/4 pounds fresh cherries, pitted
1 1/4 cups sugar
2 tablespoons cornstarch
5 teaspoons instant tapioca
1/4 teaspoon ground cinnamon
About 2 tablespoons milk (for brushing)
Extra sugar (for sprinkling)
1. In a bowl toss together cherries, sugar, cornstarch, tapioca, and cinnamon. Transfer cherry filling to the dough in the pan. Cover with the flat dough. Turn the edges under to form a neat hem all around. Crimp the edges.
2. Freeze the pie for 30 minutes.
3. Set the oven at 400 degrees.
4. Brush the dough with milk, sprinkle with sugar, and cut vents evenly around the pie.
5. Bake the pie 1 hour and 15 minutes or until the crust is golden brown and the cherry juices are bubbling up through the vents. During baking, if the edges of the crust brown too much, cover the rim with foil. Cool pie on a wire rack.
Karoline Boehm Goodnick. Adapted from Two Fat Cats Bakery.
Thursday, June 24, 2010
Gratification

A few people wondered if making a friend's wedding cake is a burden. Some even questioned why I didn't charge them for the cake. The answer, you see, is in their faces. It's really all the thanks I need.
(Love this shot and all the others taken by Jeremy Lawson! If you are in the market for a wedding photographer, you should most certainly check him out!)
Thursday, June 17, 2010
Eat More Pie
In the interest of being prepared for my new endeavors, I picked up a banana cream pie from Mission Pie last night. Really, it was all about research and had nothing to do with the intense cravings that I have been experiencing since first laying eyes on one a few weeks back. I swear. The bottom line is that the pie is now gone, tucked safely into our bellies, and it was well worth the splurge. Take a look for yourself. Warning: Viewing these photos may result in a spontaneous airplane ticket purchase and subsequent trip to San Francisco. Sweet Karoline will not be held responsible for any charges incurred.


Tuesday, June 8, 2010
Strawberry Pie
Strawberry season - while it came to California a while back - has finally made it of the rest of the country. If you find yourself unable to resist several flats, here is one delicious way to use them up!
Sunday, June 6, 2010
Friday, June 4, 2010
Wedding Bells

Congratulations to my dear friends, Kelsea and Ryan, who tied the knot last weekend! It was an honor to be a part of their big day as a bridesmaid and a baker! Love you both!
Wednesday, May 26, 2010
Icebox Cake

Icebox Cake from Boston Globe May 26, 2010
So good you'll keep a spoon next to the fridge, shamelessly reaching in for another bite every time you walk by...which you will do on purpose, without reason to actually enter the kitchen...
Wednesday, May 19, 2010
Lemon-Pecan Butter Cookies
Lemon-pecan butter cookies
I styled these cookies a while back, and I'll have you know that they are irresistable. Many times, we pawn off the results of styling or recipe testing on unsuspecting neighbors or friends like Suzan and Bryan. Other times, the temptation to scarf down the entire batch before the goodies even have a chance of being transported is far too great. This was one of those times, and I am sad to say that after popping 6 in my mouth while shooting the photo, I promptly dumped the rest into the trash. Willpower has never been my forte. The cakey treats remind me of my grandmother's pecan crescents, but they aren't as cloyingly sweet - probably due to the addition of lemon. The best part is that they are surprisingly simple -- a great project to get husbands and kids into the kitchen! (Although, in many of my friends' homes, it is the women who need the call of an easy recipe to invite them into a room of the house rarely entered!) Click on the link to view the recipe in full.
Saturday, April 17, 2010
Rhubarb Jelly
My mom's favorite jelly-making technique involves the microwave, a touch of sugar, seasonally appropriate fruit, a large Pyrex measuring bowl, and some plastic wrap. A quick zap and it's ready to be slathered on the nearest piece of freshly baked bread. Since I haven't owned a microwave since college, I had to go old school on my rhubarb. This method isn't quite as fast, but it's pretty darn simple.
Agave nectar is lower on the glycemic index and is therefore better for those who need to monitor their sugar intake. Use a smaller piece of ginger if you prefer a more subtle flavor. Adding the strawberries halfway through the cooking process keeps the flavors bright and improves the otherwise lackluster texture. This is a fairly loose jelly; use 1/4 cup water if you prefer a denser schmear.
Rhubarb Jelly
Makes 3 pints
9 large stalks rhubarb, ends trimmed and roughly chopped
1 piece (1/2 inch) ginger, finely chopped
1/2 cup water
3/4 cup agave nectar
Pinch of salt
1 pint strawberries, hulled and roughly chopped
1. In a flameproof casserole, combine all ingredients except strawberries. Bring the liquid to a boil. Reduce to a simmer. Cook, stirring frequently, for 15 minutes.
2. Stir in the strawberries. Cook, stirring frequently, for an additional 10 minutes, or until strawberries are mostly broken down. (The jelly will be sort of thick, but it will continue to thicken as it cools.)
3. Pour into jars. Store in the refrigerator.
Agave nectar is lower on the glycemic index and is therefore better for those who need to monitor their sugar intake. Use a smaller piece of ginger if you prefer a more subtle flavor. Adding the strawberries halfway through the cooking process keeps the flavors bright and improves the otherwise lackluster texture. This is a fairly loose jelly; use 1/4 cup water if you prefer a denser schmear.
Rhubarb Jelly
Makes 3 pints
9 large stalks rhubarb, ends trimmed and roughly chopped
1 piece (1/2 inch) ginger, finely chopped
1/2 cup water
3/4 cup agave nectar
Pinch of salt
1 pint strawberries, hulled and roughly chopped
1. In a flameproof casserole, combine all ingredients except strawberries. Bring the liquid to a boil. Reduce to a simmer. Cook, stirring frequently, for 15 minutes.
2. Stir in the strawberries. Cook, stirring frequently, for an additional 10 minutes, or until strawberries are mostly broken down. (The jelly will be sort of thick, but it will continue to thicken as it cools.)
3. Pour into jars. Store in the refrigerator.
Rice Pudding
There are few things that my brother loved as a child more than Kozy Shack Rice Pudding and Tapioca Pudding. I wasn't quite so fanatic, but I was known to sneak a spoonful or two from time to time. Ok, so maybe I ate the whole container. Who asked you? Anyway, last week, I was testing recipes. The recipe called for 5 cups cooked rice. I thought to myself, "Hmmm...I wonder how much raw rice that is..." I dumped 5 cups raw rice into the pot -- knowing that it would give me more than I wanted, but certain to have enough. Just between us, I made more rice than New Jersey has landfills. Since I abhor the idea of throwing out perfectly edible food, I got to thinking. Mmmmm....rice pudding. (For the record, I made so much rice that I also made a batch of congee.)
Now, rice pudding at the core isn't exactly healthy. Still, a co-worker presented me with an interesting thought. First, I made it. I know what I put in it. I controlled the process, and I attempted to use somewhat healthier alternatives. Yet, something that I have failed to consider until this point is that the actual process of making food - rice pudding, in this case - is keeping me active and up off the couch. If my fridge were stocked with Kozy Shack (as delicious as it may be), it would be world's easier to curl up under an afghan on the couch and put away the whole container without even the thought of exertion. I do, however, give you permission to lounge on the sofa, enjoying every last grain of your homemade rice pudding.
Rice Pudding
Serves 4
We chose basmati rice because of its lower glycemic index level. We also used date sugar, instead of cane sugar, for the same reason. Skim milk and heavy cream were what dairy we had on hand when the idea came to us. Feel free to use any combination of milk, cream etc that you have in your fridge. So that you are better informed than I was, 1 cup raw rice equals about 2 cups cooked rice!
1/4 cup currants
2 tablespoons brandy
4 cups cooked basmati rice
2 cups skim milk
1/2 cup heavy cream
Pinch salt
1/2 cup date sugar
1 vanilla bean, scraped
Pinch cinnamon
1. In a small bowl, plump currants with brandy for 20 minutes.
2. In a large flameproof casserole, combine all ingredients. Bring liquid to a boil. Simmer for 5 minutes. Serve warm or chilled - but, I think it's best right out of the pot.
Now, rice pudding at the core isn't exactly healthy. Still, a co-worker presented me with an interesting thought. First, I made it. I know what I put in it. I controlled the process, and I attempted to use somewhat healthier alternatives. Yet, something that I have failed to consider until this point is that the actual process of making food - rice pudding, in this case - is keeping me active and up off the couch. If my fridge were stocked with Kozy Shack (as delicious as it may be), it would be world's easier to curl up under an afghan on the couch and put away the whole container without even the thought of exertion. I do, however, give you permission to lounge on the sofa, enjoying every last grain of your homemade rice pudding.
Rice Pudding
Serves 4
We chose basmati rice because of its lower glycemic index level. We also used date sugar, instead of cane sugar, for the same reason. Skim milk and heavy cream were what dairy we had on hand when the idea came to us. Feel free to use any combination of milk, cream etc that you have in your fridge. So that you are better informed than I was, 1 cup raw rice equals about 2 cups cooked rice!
1/4 cup currants
2 tablespoons brandy
4 cups cooked basmati rice
2 cups skim milk
1/2 cup heavy cream
Pinch salt
1/2 cup date sugar
1 vanilla bean, scraped
Pinch cinnamon
1. In a small bowl, plump currants with brandy for 20 minutes.
2. In a large flameproof casserole, combine all ingredients. Bring liquid to a boil. Simmer for 5 minutes. Serve warm or chilled - but, I think it's best right out of the pot.
Wednesday, March 31, 2010
Easter Bread

Eggy loaf for the holiday
By Karoline Boehm Goodnick, Globe Correspondent | March 31, 2010
An important symbol of the end of Lent and the celebration of the resurrection, this rich, yeasted bread has as many versions as there are denominations of Christianity. In Austria and Germany, bakers produce wreaths known as osterkranz. Italians bake at least five variations, including the Sicilian centerpiece shaped like a crown of thorns; recipes differ with the addition of pine nuts, citrus zest, and candied fruits. Many cultures place dyed eggs in the bread, representing new life and spring’s fertile optimism. In Argentina, Roman Catholics favor rosca, a ring-shaped loaf topped with pastry cream and chocolate.
Enlist the children to dye the eggs. Room temperature eggs bleed less, preventing unsightly streaks on the finished loaf. A simple twist resembles traditional braids, yet can be accomplished by a novice. If twisting seems too difficult, try a ring, round loaf, or two strands intersected as a cross.
Makes 1 loaf
Butter (for the pan)
1/2 cup dried fruit, chopped
1/4 cup brandy
2 teaspoons yeast
1 tablespoon plus 1 1/2 teaspoons sugar
1/4 cup lukewarm water
2 tablespoons butter, softened
2 tablespoons milk, heated to warm
2 eggs
2 cups flour
Pinch of salt
1/4 teaspoon anise seed
Flour (for sprinkling)
Oil (for the bowl)
3 dyed hard-cooked eggs, at room temperature
1 teaspoon water (for egg wash)
1. Set the oven at 325 degrees. Butter a rimmed baking sheet.
2. In a small pan, combine the dried fruit and brandy. Bring to a boil; set aside.
3. In a small bowl, whisk the yeast, 1 1/2 teaspoons sugar, and warm water. Set aside for 5 minutes.
4. In a mixer with a dough hook, mix butter, milk, and 1 of the eggs. Add the yeast mixture, and blend. Add 1 1/2 cups flour, the remaining 1 tablespoon sugar, salt, and anise seed. Mix on low speed for 2 minutes.
5. Add the remaining 1/2 cup flour and dried fruit mixture. Mix on low speed for 2 to 3 minutes, or until dough begins to form a ball.
6. Transfer to a lightly floured surface. Knead for 1 minute, or until dough is smooth.
7. Oil a bowl. Add the dough, cover, and set in a warm place to rise for 1 hour, or until doubled in bulk.
8. Transfer the dough to a lightly floured surface. Divide the dough into 2 pieces. Roll each piece into a 12-inch strand. Lay the strands side by side, and twist together, securing both ends.
9. Place the twisted dough on the baking sheet. Carefully tuck the dyed eggs into the crevice between the strands. Cover with a clean towel. Set in a warm place, and let the dough rise for 45 minutes, or until doubled in size.
10. In a small bowl, whisk together the remaining egg and 1 teaspoon water. Gently brush the risen loaf with the egg wash.
11. Bake the bread for 30 minutes, rotating from front to back after 15 minutes, or until crust is a deep golden brown.
12. Transfer the loaf to a wire rack. Cool for 15 minutes.
GLAZE
1/2 cup confectioners’ sugar
1 tablespoon lemon juice
1. In a small bowl, whisk together the confectioners’ sugar and lemon juice.
2. Place the bread and the rack on a baking sheet.
3. Using a spoon, drizzle the glaze over the cooled loaf. Leave it to set.
Tuesday, March 23, 2010
Baking for Passover
No, I'm not Jewish - despite the fact that the Ben Goodnick who pops up in a Google search is a rabbi -- but I am intrigued by Kosher dietary laws, and I do enjoy a good flourless chocolate cake. What follows are two recipes from the March 24th edition of the Boston Globe. The first is dense and moist -- sinful and dark. The second is light and nutty -- perhaps fleeting and ethereal. Both are delicious, and both are suitable for either Passover or satisfying the sweet tooth of gluten-free friends!
For the Seder, it’s icing on the cake
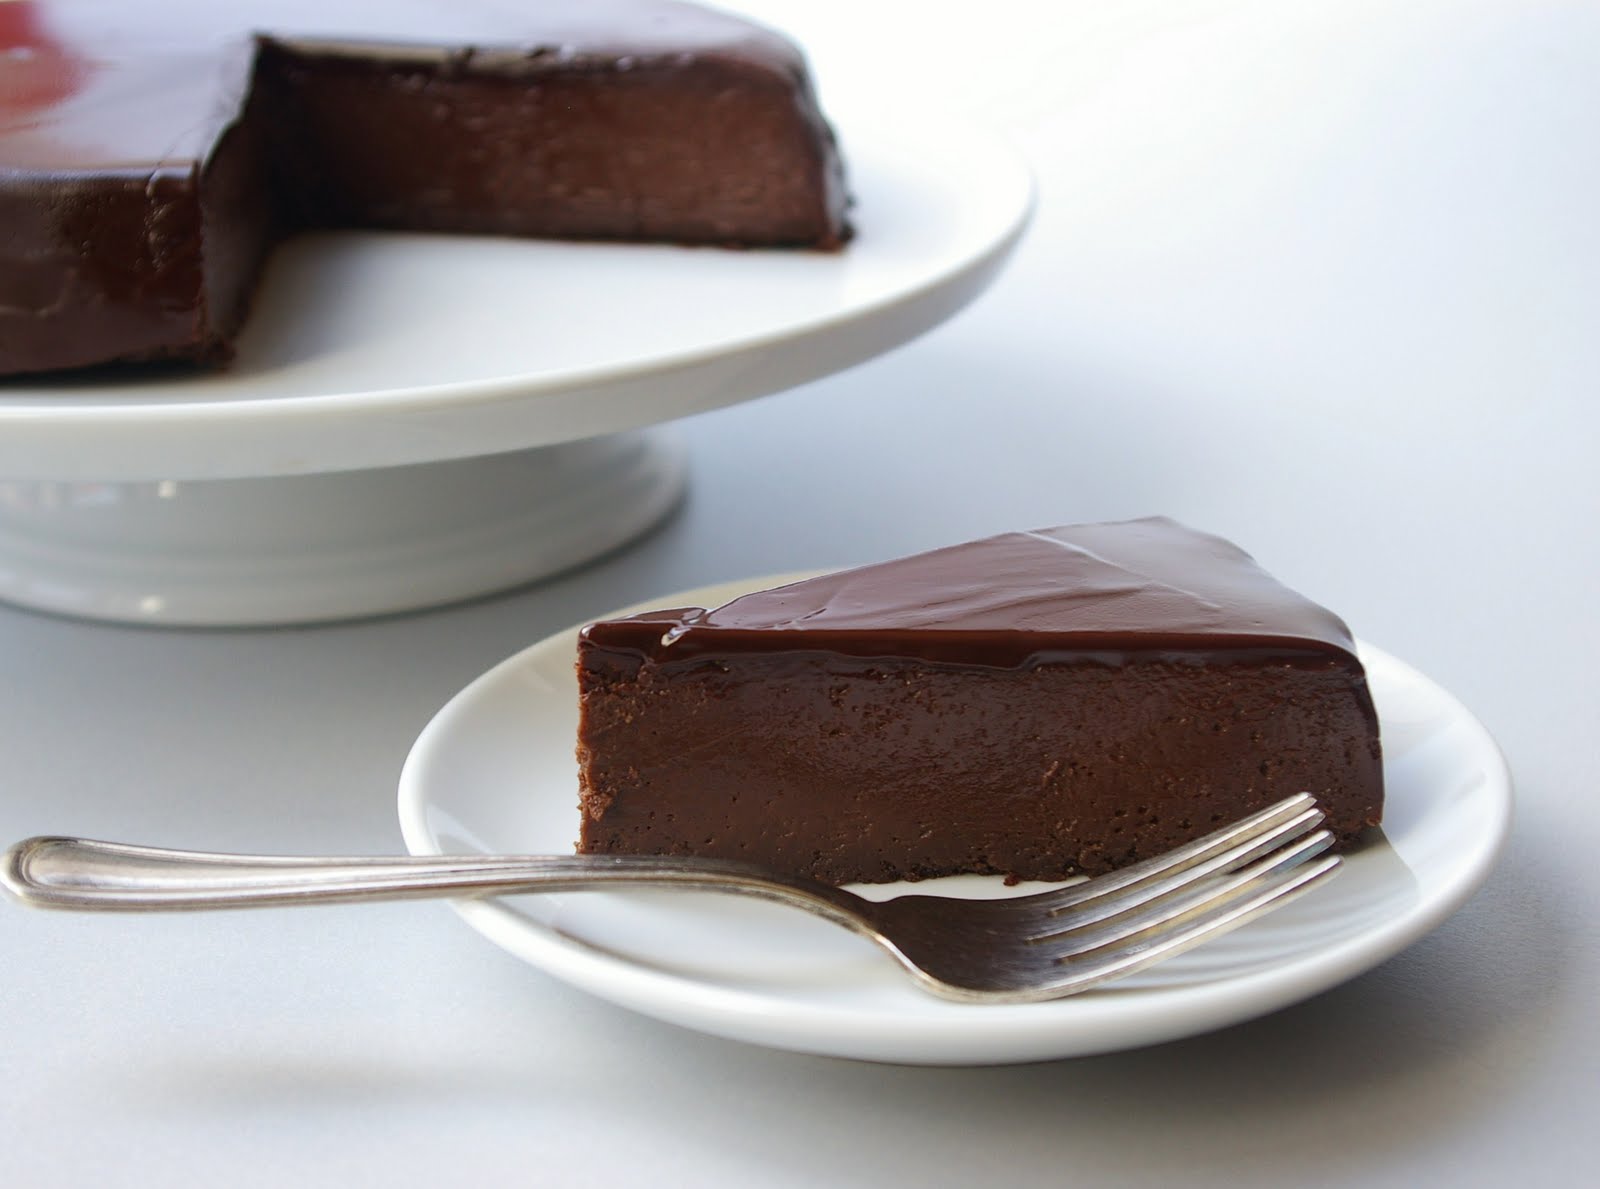
Many Passover hosts have spent years searching for the perfect flourless chocolate cake. When the holiday begins next Monday night with the first Seder, some good bakers will have found their ultimate holiday confection. If not, keep reading.
Unlike traditional flourless chocolate cakes, which are souffle-like and delicate, this cake is dense and moist. It’s so rich that a sliver will suffice. Serve it at room temperature so the glaze and the interior meld into one. This is actually a classic French torte and it relies heavily on butter. If you cannot serve a cake made with dairy products for dietary reasons, substitute margarine for butter, tablespoon for tablespoon, and omit the salt.
The technique is similar to making a giant brownie. You need only a bowl and a large whisk, and a double boiler (or heatproof bowl set over a saucepan). Bake the cake in a water bath to slowly bring the eggs up to temperature. Rotating and removing the roasting pan from the oven can be tricky procedure. Take your time and make sure it’s secure in your hands. Once the cake has been cooled and inverted onto a wire rack, you can glaze it.
The temperature of the glaze should not be hot to the touch nor should it be stiff. Cool glaze will act more like an icing. Too warm and it will run quickly off the sides of the cake. But if this happens, don’t worry. Scrape the glaze back into a bowl, cool for a few minutes more, and pour again. Chill the finished cake in the refrigerator only until the glaze sets. Then, immediately remove it from the rack and transfer to a platter. Watch the crowd gather round.
Flourless Chocolate Cake
Makes one 9-inch cake
CAKE
Butter (for the pan)
6 ounces bittersweet chocolate, coarsely chopped or 1 cup bittersweet chocolate chips
1 1/4 cups (2 1/2 sticks) unsalted butter, cut up
3/4 cup brewed strong coffee
1 tablespoon vanilla extract
5 eggs plus 2 extra yolks
1 cup sugar
2 teaspoons unsweetened cocoa powder, sifted onto waxed paper
Pinch of salt
1. Set the oven at 325 degrees. Lightly butter a 9-inch layer cake pan, line the bottom with a circle of parchment paper cut to fit in, and butter the paper. Have on hand a roasting pan.
2. In the top of a double boiler over hot but not boiling water, melt the chocolate and butter, stirring until smooth. Stir in the coffee and vanilla. Remove the top of the double boiler and wipe the bottom.
3. In a large bowl, whisk the eggs, extra yolks, and sugar. Slowly whisk in the chocolate mixture. Whisk in cocoa powder and salt.
4. Transfer the batter to the cake pan. Set the cake pan in the roasting pan. Place the roasting pan in the oven. Pour enough warm tap water into the roasting pan to come halfway up the outside of the cake pan.
5. Bake the cake for 45 minutes, rotating from front to back halfway through baking, or until the cake is set. Do not let it cook until the top is hard or the cake may dry out.
6. Remove the cake pan from the water bath and leave to cool; refrigerate overnight.
GLAZE
9 ounces bittersweet chocolate, coarsely chopped or 1 1/2 cups bittersweet chocolate chips
3/4 cup (1 1/2 sticks) unsalted butter, cut up
1. Run a knife around the edge of the cake to loosen it from the pan. Carefully place the pan in a shallow bowl of hot water (hold the pan so the cake doesn’t get wet). Warm the cake for 2 minutes. Wipe the bottom of the pan. Invert it onto a wire rack. Lift off and discard the parchment paper. If the cake does not release, place the pan in the water for another minute and repeat.
2. Set the cake and the wire rack in a rimmed baking sheet. Refrigerate while you prepare the glaze.
3. In the top of a double boiler, melt the chocolate and butter, stirring until smooth. Remove the top of the double boiler and wipe the bottom. Cool the glaze for 5 minutes.
4. Pour the glaze over the cake. With an offset or rubber spatula, smooth any excess glaze over the cake.
5. Refrigerate for 10 minutes or until the glaze sets. Using a metal spatula, loosen the edges of the cake from the wire rack. Transfer to a serving platter. Use a knife dipped in hot water and dried to cut even slices.
Go to the Globe site to see the full recipe for the Italian Chocolate-Almond Torte. (Pictured below.)
Subscribe to:
Posts (Atom)