Showing posts with label Vegetarian. Show all posts

Saturday, October 9, 2010

Grilled Pizza


Just a photo that I wanted to share with you from our trip home to St. Louis back in August. Grilled pizzas are becoming quite popular. The bonus is that they are super easy to make. Just keep the dough thin and the heat high!

Wednesday, September 29, 2010

Whole Wheat Pancakes with Apple Compote


Whole-wheat pancakes with apple compote
September 29, 2010
Boston Globe

Serves 4

Whole-wheat pancakes, made with beaten egg whites, are hearty and nutty, a good match for an apple compote with walnuts, raisins, maple syrup, and warm spices. Double the compote recipe to keep on hand for other breakfasts or to set beside pork chops at supper.

COMPOTE

4 baking apples (see Page 19), peeled, seeded, and chopped
1/4 cup chopped walnuts
1/4 cup golden raisins
1 tablespoon butter
1/4 cup maple syrup
1/4 cup water
Juice of 1 lemon
Pinch of ground cinnamon
Pinch of ground nutmeg
Pinch of salt

1. In a heavy saucepan over high heat, combine apples, walnuts, raisins, butter, maple syrup, water, lemon, cinnamon, nutmeg, and salt.

2. Bring liquid to a boil, lower the heat, and cook over medium-high heat, stirring often, for 10 minutes or until apples soften.

PANCAKES

4 eggs, separated
1 1/2 cups milk
1/4 cup sour cream
1/4 cup sugar
2 tablespoons canola oil
1/2 teaspoon salt
2 teaspoons baking powder
1/2 teaspoon baking soda
1 1/2 cups whole-wheat flour
1 1/2 cups all-purpose flour
Canola oil (for the pan)
1/2 cup heavy cream, softly whipped (optional)

1. In a bowl, whisk the egg whites until they hold stiff peaks; set aside.

2. In another large bowl, stir together yolks, milk, sour cream, sugar, canola oil, and salt. With a rubber spatula, fold in the baking powder, baking soda, and whole-wheat and all-purpose flours. Fold in the whites.

3. Heat a large nonstick skillet over medium heat. Add a few drops of canola oil and swirl it around in the pan.

4. Ladle the batter by the 1/4 cupfuls, adding about 4 to the pan. Cook for 2 to 3 minutes or until bubbles form on the tops of the pancakes. Turn and cook 2 to 3 minutes more or until golden on the undersides. Wipe pan with oil between batches.

5. Serve pancakes with apple compote and whipped cream, if you like.

Apple Clafoutis


Apple clafoutis
September 29, 2010
Boston Globe

Serves 6

Traditionally made in the Limousin region of France with sour cherries, this rustic dessert offers a platform to showcase seasonal fruit. The mixture is similar to a crepe or pancake batter. Let it rest and it will develop flavor. Saute apples in butter and sugar, then combine the fruit and batter in a baking dish. As it cooks, it turns into a souffle with a golden crust, which falls as it cools (it’s supposed to) and tastes almost creamy.

BATTER

2 eggs plus 2 extra yolks
1/2 cup sugar
Pinch of salt
2 teaspoons vanilla extract
1/2 cup flour
3/4 cup milk
1/2 cup heavy cream

1. In a blender, work the eggs, extra yolks, sugar, salt, and vanilla for 30 seconds. Add the flour and blend until smooth.

2. With the machine running, pour in milk and cream. When the mixture is smooth, set aside for 30 minutes.

APPLES

2 tablespoons butter
4 baking apples, peeled, seeded, and chopped
2 tablespoons granulated sugar
Salt, to taste
2 tablespoons brandy
Butter (for the dish)
1 teaspoon granulated sugar mixed with 1/2 teaspoon ground cinnamon
Confectioners’ sugar (for sprinkling)

1. In a large skillet over medium-high heat, heat the butter. Add the apples, 2 tablespoons granulated sugar, and salt. Cook, stirring often, for 5 minutes, or until apples are tender. Remove pan from heat, and add brandy. Return pan to heat, and cook for 2 minutes.

2. Transfer the apples to a plate; leave to cool.

3. Set the oven at 350 degrees. Butter a deep 9-inch baking dish.

4. Lay the apples in the dish. Cover with batter. Sprinkle with the cinnamon-sugar mixture.

5. Bake for 35 to 40 minutes, or until the mixture is puffed and golden, and a knife inserted into the center comes out clean.

6. Cool on a wire rack. Sprinkle with confectioners’ sugar.

Honey Caramel Apple Dip


Honey-caramel apple dip
Boston Globe
September 29, 2010

Serves 6

You may have noticed individual packs of caramel sauce lining produce shelves for dipping apples. It’s easy enough to make your own. You need a candy thermometer and a large saucepan (the steps are simple, but working with sugar is precise). Use caution with children around as caramel reaches extremely hot temperatures and crawls high up the sides of the pot. For added fun, set up a dipping bar with chocolate chips, chopped nuts, and red hot cinnamon candies. Skip the stick.

1 1/2 cups plus 2 tablespoons heavy cream
1/2 teaspoon salt
1 cup honey
6 apples, cored and cut into wedges

1. In a large, heavy bottom saucepan, heat 1 1/2 cups of the cream and salt over high heat just until small bubbles begin to form on the surface (just before a simmer).

2. Stir in the honey and bring to a boil. Let the mixture bubble steadily, stirring often with a wooden spoon, for 10 minutes or until a candy thermometer registers 240 degrees. Carefully remove saucepan from the heat.

3. In a small saucepan, heat the remaining 2 tablespoons cream. Stir warm cream into hot caramel.

4. Transfer caramel to a heatproof bowl. Set aside to cool completely. Serve at room temperature with apple wedges.

Friday, September 17, 2010

Modern 3 Bean Salad


Modern three-bean salad
From The Boston Globe
September 15, 2010

Serves 4

Once the result of several cans of beans tossed with sugar and vinegar, three-bean salad has been updated. For ease, keep at least one can in the mix (kidney beans) and toss in your favorite variety of frozen beans (such as limas). Blanched green beans add freshness, limas and kidneys protein, bell pepper and red onion some crunch. Instead of cilantro, substitute dill or parsley, if you like. Add chopped smoked salmon for a more substantial dish, and move the salad from the side table to the main course.

2 tablespoons olive oil
1 teaspoon ground cumin
1 can (15 ounces) red kidney beans, drained and rinsed
2 tablespoons cider vinegar
1 package (10 ounces) frozen lima beans, rinsed with cold water
1 green bell pepper, cored and chopped
1 small red onion, finely chopped
1 clove garlic, finely chopped
Salt and pepper, to taste
1/2 pound green beans, trimmed and cut into 2-inch pieces
2 tablespoons chopped fresh cilantro

1. In a skillet, heat the olive oil. Add the ground cumin and red kidney beans. Stir well for 1 minute. When they are hot, stir in vinegar.

2. Stir in limas beans. Cook for 1 minute more.

3. In a large bowl, combine bell pepper, onion, garlic, salt, and pepper. Add kidney bean mixture. Toss gently and set aside for 30 minutes or until cool.

4. Bring a saucepan of salted water to a boil. Add green beans and cook for 3 minutes, or until tender but still have some bite. Drain and rinse with cold water until the beans are no longer hot. Pat them dry with paper towels.

5. Add the green beans and cilantro to the kidney bean mixture. Toss well. Taste for seasoning, and add more salt and pepper, if you like.

Karoline Boehm Goodnick

Friday, September 3, 2010

Mexican Corn on the Cob


Mexican corn on the cob
By Karoline Boehm Goodnick, Globe Correspondent | August 18, 2010

Serves 6

Also known as elote, Mexican-style corn on the cob can be boiled first or grilled over hot coals until the kernels are charred and toasty. It’s a dish that began as street food and is now served in good restaurants. The white cheese cotija is at many specialty markets, but you can substitute a dry, crumbly cheese such as feta. Sprinkle with cayenne pepper for a kick of spice, guajillo for smoky notes, or paprika for sweet earthiness. Finish with a spritz of lime to make it pop.

Salt, to taste
6 ears of corn, shucked
3 tablespoons mayonnaise
1 cup crumbled cotija cheese
2 teaspoons cayenne pepper, guajillo, or paprika
2 limes, quartered
1. In a large shallow pot, bring several inches of salted water to a boil. Add the corn, cover, and cook for 3 minutes, turning once.

2. Remove the corn from the water, and pat dry with paper towels.

3. Spread 1/2 tablespoon mayonnaise on each ear. Sprinkle corn with crumbled cheese, pressing lightly so it sticks. Sprinkle with salt and cayenne pepper, guajillo, or paprika. Serve with lime.

Sunday, August 15, 2010

More From Top Chef


Other recipes we've been working on at Top Chef are panzanella (Italian bread salad) and hummus! This salad recipe is a great way to get kids to eat their veggies; everybody wants to dive right into the salad that they made with their own two hands!


Hummus becomes extra magical when Auritte explains the ritual consumption in her homeland of Israel. Wipe it up with pita or spread it on a whole wheat dinner roll.


We make hummus at home from dried garbanzo beans, but canned is easier for the kids, and you might find out the same. This simple recipe has great results.


Hummus is a middle-eastern dip made with chickpeas (also known as garbanzo beans), seasonings, and tahini (sesame seed butter). The dip is often served with raw vegetables, spread on pita bread, or schmeared on a sandwich.

Drizzling in the olive oil helps us to understand the process of emulsification. Think about what happens when you try to mix oil and water. The oil will float to the top and will not mix in with the water. Emulsification is the process of blending the fat and liquid together. By drizzling the oil into the machine while it is running, we can emulsify the oil and create a smooth, homogenous dip.

Serves 6 people as a dip

1 can (15 ounces) chickpeas, drained
2 cloves garlic, smashed
Juice of 1 lemon
1/2 teaspoon salt
2 tablespoons tahini
2 tablespoons olive oil
Olive oil for drizzling
Paprika for sprinkling

1. Put chickpeas, garlic, lemon juice, salt, and tahini in a food processor. Process until slightly smooth.
2. With the machine running, slowly stream in the olive oil.
3. Continue processing until hummus is smooth.
4. Taste for seasoning. Add more salt or lemon juice if necessary. Garnish with olive oil and paprika.


Whole wheat dinner rolls
Makes 12

1 1/4 cups whole wheat flour
2 tablespoons sugar
1/2 teaspoon salt
1 (1/4-ounce) package active dry yeast
1 cup warm (105 to 115°F) milk
3 tablespoons butter, melted
1 large egg, lightly beaten
1 cup all-purpose flour

1. In a large bowl, stir together whole wheat flour, sugar, salt and yeast. Stir in milk, butter, and egg. Beat until the mixture is smooth.
2. Add all-purpose flour and mix again until the batter is smooth.
3. Cover bowl with plastic wrap. Let rise in the refrigerator for 1-2 hours, or until it has doubled in size.
4. Stir the batter to deflate it slightly. Grease the muffin pans with pan spray. Scoop even amounts of batter into each muffin cup.
5. Cover with plastic and set aside. Proof for about 1 hour, or until rolls have grown up over the top of the muffin pans. Set the oven at 400 degrees.
6. Bake rolls for 15- 20 minutes or until golden brown. Serve warm with homemade butter.

Wednesday, August 11, 2010

Spicy Melon Salad


Spicy melon salad
From the Boston Globe on August 4, 2010

Serves 6

Popularized by street carts in Mexico and Latin neighborhoods throughout the United States, this versatile dish can be served any time of day. Vendors sell zip-top bags filled with diced fruit. They add salt, lime juice, and dried chili powder to order. Bring these fresh flavors to your table, replacing chili powder with sliced jalapeno and chopped mint. Mix it up with pineapple, papaya, jicama, or mango. Season with salt just before serving, as it quickly leeches juices from the fruits.

2 cantaloupe, honeydew, or other ripe melons (about 6 pounds total), halved, seeded, peeled, and chopped
Grated rind of 1 lime
Juice of 2 limes
1/2 jalapeno, seeded and thinly sliced
1 tablespoon chopped fresh mint
1/2 teaspoon salt

1. In a large bowl, combine melon, lime rind and juice, jalapeno, and mint.

2. Stir well, cover, and refrigerate for 1 hour. Sprinkle with salt and stir gently.

Karoline Boehm Goodnick

Wednesday, May 26, 2010

Eggplant Roll-ups


Eggplant roll-ups
May 26, 2010

Serves 6

These roll-ups can either start the meal or accompany the main course at a barbecue. Create long, wide planks by slicing the eggplant lengthwise, then grill and fill with roasted red peppers and mozzarella. Roasted red peppers are available in jars at many markets, but it takes only a few minutes to grill your own. Blacken the skins completely so they come off easily when cool. Serve these on their own or accompanied by pasta and garnished with pesto or a favorite marinara and a sprinkle of fresh herbs.

3 red bell peppers
2 large eggplants, trimmed and sliced 1/4inch thick lengthwise
3 tablespoons olive oil
Salt and pepper, to taste
1 tablespoon balsamic vinegar
8 ounces mozzarella, cut into thick matchsticks

1. Light a charcoal grill and wait for the coals to turn gray; mound them in the center of the grill. Or set a gas grill to medium-high. Have on hand a rimmed baking sheet and toothpicks.

2. Place red peppers over the hottest part of the grill. Roast for 15 minutes, turning often, or until charred. Transfer to a bowl, cover, and set aside for 20 minutes.

3. On baking sheet, arrange 1 layer of eggplant. Brush with oil, and sprinkle with salt and pepper. Turn the slices, and repeat on the other side. Continue on all the slices.

4. Grill the eggplant for 2 minutes on a side or until they are tender and charred. Return the eggplant to the baking sheet; set aside.

5. Remove and discard the skins, seeds, and stems from the red peppers. Slice the peppers into thin strips. In a small bowl, combine the peppers with vinegar, salt, and pepper.

6. Lay the eggplant slices on a work surface with the widest end facing you. Place several strips of red pepper and a few pieces of mozzarella across the widest part of the eggplant. Roll the eggplant around the filling; secure with a toothpick. Repeat with the remaining slices.

7. Set the roll-ups on a cool grill. Cover and cook for 3 minutes or until the cheese melts.

Panzanella


This could be the best salad that I have ever eaten...no lie...I wouldn't falsify such a grandiose statement. Try it, and let me know if you disagree. P.S. It is best when washed down with a glass of chianti on a lazy Sunday (or Thursday, if you will) afternoon. (P.S. Did I mention how terribly easy it is to throw together?)

Panzanella
The Boston Globe, May 26, 2010

Serves 6

The traditional Italian salad panzanella was born from the need to use up stale bread. Some versions call for soaking the loaf in water. It’s more luxurious to rub a crusty baguette with olive oil and garlic and grill the pieces for a few minutes, lending smoky notes to the finished bowl of arugula, tomatoes, and red onion. For a pretty presentation, choose multicolored cherry tomatoes.

1 baguette, halved lengthwise
5 tablespoons olive oil
Salt and pepper, to taste
3 cloves garlic, halved
1/2 pint cherry tomatoes in mixed colors, quartered
2 large tomatoes, cut into wedges
1 small red onion, thinly sliced
1 bunch fresh arugula, stems trimmed
1/3 cup chopped fresh basil
1/4 cup balsamic vinegar
4 ounces fresh goat cheese, crumbled

1. Light a charcoal grill and wait for the coals to turn gray or set a gas grill to medium.

2. Brush the baguette with 3 tablespoons of olive oil and sprinkle with salt and pepper.

3. Grill the baguette for 2 minutes on a side or until crisp and slightly charred. Remove bread from grill and rub with garlic cloves. Tear into bite-sized pieces.

4. In a large bowl, combine grilled bread, cherry and regular tomatoes, onion, arugula, basil, vinegar, and 2 tablespoons olive oil. Sprinkle with salt and pepper. Toss gently.

5. Divide the salad among 6 plates and sprinkle with goat cheese.

Wednesday, May 12, 2010

Salsa Verde


Last week, we had a small fiesta in honor of Cinco de Mayo. It only seemed fitting given the ethnicity of the majority of our neighbors. We don't claim to be experts on their cuisine, but we certainly have a good time trying. A few margaritas and even more Negra Modelos washed down our meal of grilled snapper, jicama/cucumber salad, grilled nopales (hence the photo above in which Ben is removing the spines of the cactus), and the quintessential chips with guac. The super easy salsa verde recipe below made a great addition to the fish tacos. You could also pair it with enchiladas, chilaquiles, or schmear it on a good old American burger.

Salsa Verde
Makes 2 cups

4 large or 10 tiny tomatillos
1/4 cup green hot sauce (Try El Yucateco if you don't want to make your own)
1/2 avocado
1 scallion, chopped
1 clove garlic
1/4 cup water
1 tablespoon chopped cilantro
salt and pepper, to taste

1. In a pot of salted, boiling water, blanch tomatillos for 4 minutes or until tender. Drain.
2. Combine all ingredients in blender.
3. Puree until smooth. Taste for seasoning, and add more salt and pepper, if you like.

Saturday, April 17, 2010

Rice Pudding

There are few things that my brother loved as a child more than Kozy Shack Rice Pudding and Tapioca Pudding. I wasn't quite so fanatic, but I was known to sneak a spoonful or two from time to time. Ok, so maybe I ate the whole container. Who asked you? Anyway, last week, I was testing recipes. The recipe called for 5 cups cooked rice. I thought to myself, "Hmmm...I wonder how much raw rice that is..." I dumped 5 cups raw rice into the pot -- knowing that it would give me more than I wanted, but certain to have enough. Just between us, I made more rice than New Jersey has landfills. Since I abhor the idea of throwing out perfectly edible food, I got to thinking. Mmmmm....rice pudding. (For the record, I made so much rice that I also made a batch of congee.)

Now, rice pudding at the core isn't exactly healthy. Still, a co-worker presented me with an interesting thought. First, I made it. I know what I put in it. I controlled the process, and I attempted to use somewhat healthier alternatives. Yet, something that I have failed to consider until this point is that the actual process of making food - rice pudding, in this case - is keeping me active and up off the couch. If my fridge were stocked with Kozy Shack (as delicious as it may be), it would be world's easier to curl up under an afghan on the couch and put away the whole container without even the thought of exertion. I do, however, give you permission to lounge on the sofa, enjoying every last grain of your homemade rice pudding.

Rice Pudding
Serves 4

We chose basmati rice because of its lower glycemic index level. We also used date sugar, instead of cane sugar, for the same reason. Skim milk and heavy cream were what dairy we had on hand when the idea came to us. Feel free to use any combination of milk, cream etc that you have in your fridge. So that you are better informed than I was, 1 cup raw rice equals about 2 cups cooked rice!

1/4 cup currants
2 tablespoons brandy
4 cups cooked basmati rice
2 cups skim milk
1/2 cup heavy cream
Pinch salt
1/2 cup date sugar
1 vanilla bean, scraped
Pinch cinnamon

1. In a small bowl, plump currants with brandy for 20 minutes.
2. In a large flameproof casserole, combine all ingredients. Bring liquid to a boil. Simmer for 5 minutes. Serve warm or chilled - but, I think it's best right out of the pot.

Gazpacho


Gazpacho is one of my favorite summer time treats. Savored with a crisp white wine under the heat of a blazing sun -- could there be anything better? Recent research also tells me that it pairs magnificently with a grilled cheese sandwich.

I realize that it is not yet summer (wishful thinking, I guess), even though today in sunny CA it is breezy and in the 70s - the kind of weather from which young romances blossom. The reason that I am posting this recipe unseasonably early is that I am prepping for a class that I will be teaching with Chef Becca Alonzi of Seasonal Elegance Catering. Beginning in June, Becca and I will be molding young minds (and hands) at Celsius and Beyond Summer Camp. Becca is the real mastermind behind the project, and I will be assisting her one day a week on Bread Day! Although gazpacho is not bread per se, it is derived from a tried and true method of using up dried out, crusty bread. So, there you have it. Tuck this one away in your virtual recipe box, and pull it out as soon as the sun begins to warm your neck of the world -- keeping the wine for yourself, of course, not the kids!

Gazpacho
Makes 1 Gallon

(Chop the veggies roughly. There is no need for perfection here since all will end up whirring in the blender.)

4 slices stale bread, chopped
10 tomatoes, cored and chopped
2 green bell peppers, stemmed, seeded and chopped
1 cucumber, chopped
1 red onion, chopped
2 cloves garlic, smashed
1/4 cup vinegar
1/2 cup olive oil
1/2 cup water
Salt and pepper, to taste
1/2 cucumber, peeled and finely chopped (for garnish)

1. In a large bowl, combine all ingredients except for cucumber garnish.
2. Working in small batches, blend the soup in a food processor until smooth.
3. With a food mill or a fine mesh sieve, strain the soup.
4. Taste for seasoning, and add more salt and pepper, if you like. Garnish with cucumbers. Serve ice cold.

Wednesday, March 31, 2010

Lasagna - The Old School Way


Yes, I understand that the above photo is more like spaghetti than lasagne, but we made them on the same day. And, while the lasagne looked (and tasted, I might add) fantastic, this photo won out. Surely, you can see why.

This dish is a labor of love. Feel free to incorporate only the "scratch" parts that interest you. For example, if you are much too tired to make pasta, use store-bought, but find the time to make the sauce. You get the idea.

The pasta recipe below will make about twice as much as you will need for this dish. You can either cut the recipe in half, or reserve the extra for making ravioli or spaghetti. It's probably better to go for the extra dough since you are already in the process of making pasta. Dry the noodles by hanging them over a rod, and then store in the freezer.

When you assemble the lasagne, don't fret too much about the layering. If I have failed to clearly articulate the idea, just be sure to end with a nice coating of sauce topped with a hearty dose of cheese - that's really all that matters!

Tomato Sauce

1 tablespoon olive oil
5 cloves garlic, finely chopped
1 medium onion, chopped
1 tablespoon red pepper flakes
15 plum tomatoes, cored, halved, and squeezed free of seeds
Bouquet garni - sprig of thyme, sprig fresh oregano, 1 dried bay leaf (tied with twine)
1 cup red wine
Salt and pepper, to taste
1/2 bunch basil, finely chopped

1. Set the oven at 400 degrees. In a large flameproof casserole, heat olive oil over high heat. Add onion and garlic. Cook, stirring frequently, for 5 minutes or until the onions start to become tender.
2. Add red pepper flakes, toasting for 1 minute to release the aromas.
3. Add tomatoes, bouquet garni, wine, and black pepper. Bring liquid to a boil.
4. Place the casserole in the oven, and cook for 45 minutes.
5. Stir, breaking up any large chunks. Season with salt and pepper. Remove and discard bouquet garni. Stir in basil.

Roasted Eggplant

2 medium eggplants
Olive oil, for drizzling
Salt and pepper, to taste

1. Make sure the oven is still set at 400 degrees. Remove the top and bottom of each eggplant; discard. Cut both into 1/2 inch slices.
2. Place a wire cooling rack on a baking sheet. Lay out the slices of eggplant (it's ok if they overlap slightly). Drizzle with olive oil and season with salt and pepper.
3. Bake for 25 minutes or until tender.

Ricotta

6 1/4 cup skim milk
1 cup plain goat's milk yogurt (ok to sub cow's milk)
1 3/4 cup heavy cream
1 tablespoon vinegar
1 teaspoon salt
1 tablespoon chopped fresh oregano
1 egg, lightly beaten
1/4 cup parmesan cheese

1. In a large pot, slowly bring milk, yogurt, cream, vinegar, and salt to a boil. Boil lightly for 2 minutes or until you can see visible curds forming.
2. Spoon the curds into a fine mesh strainer lined with cheesecloth. Pour the remaining liquid over the curds. Wrap the cheesecloth around the ricotta and squeeze to drain. Place a weighted object over the top and leave to drain for 30 minutes.
3. Stir in oregano, egg, and parmesan.

Whole Wheat Pasta

3 cups whole wheat pasta
1 cup all purpose flour
4 eggs
3/4 cup water
2 tablespoons olive oil
Pinch salt
Flour, for kneading

1. In a stand mixer fitted with a dough hook, combine all of the ingredients. Mix on medium speed for 3 to 4 minutes or until the dough forms a ball.
2. Turn the dough out onto a lightly floured surface. Knead for a minute or 2, or until the surface of the dough is smooth. Cover with plastic, and let it rest 10 minutes.
3. Using a pasta roller or a rolling pin, cut the dough into sections and roll to a paper thin consistency. (On our machine, this was #5, with 7 being the thinnest.) Cut the rolled dough into 12 pieces that are 3 inches by 9 inches. As you complete them, lay the pieces on a plate with waxed paper or parchment between each layer.

Lasagne assembly

Olive oil, for greasing
2 cups mozzarella
1/4 cup parmesan cheese

1. Set the oven to 350. Grease a 9x9 baking pan.
2. Begin by spooning 1/5 of the tomato sauce into the pan, spreading it to the edges. Top the sauce with three pieces of pasta, laid side by side to form a complete layer. Sprinkle 1/4 of the ricotta and some mozzarella on top of the pasta. Lay approximately 5 slices of eggplant across the cheese. Begin again with the sauce, and repeat until the pan is full. You should have 5 layers of sauce, 4 layers of pasta, 4 layers of ricotta, and 3 layers of eggplant. You will not use a fourth layer of eggplant, instead ending with sauce and the remaining mozzarella. Sprinkle the parmesan over the top.
3. Bake for 40 minutes, or until the sauce is bubbling and the cheese is golden and crunchy.
4. Cool 5 minutes before slicing.

Thursday, March 25, 2010

Barbecue Sauce


This one's been on the to-do list for far too long. A by product of Quigs' birthday party prep back in February, this recipe requires many hours on the stove but is well worth the effort!

1 large onion, chopped
2 large ancho chiles, stems removed
7 cloves garlic, crushed
3 whole cloves
9 allspice berries
1 bay leaf
1 tablespoon whole black peppercorns
1 1/2 cups vinegar(we used cider)
1/4 cup molasses
1/4 cup honey
1 tablespoon cocoa powder
1/2 cup date sugar
Salt, to taste
10 medium tomatoes, chopped

1. In a large, flameproof casserole, combine everything except for tomatoes. Bring liquid to a boil. Reduce the heat to a simmer, and cook, stirring often, until the liquid is a thick syrup with large bubbles.
2. Add tomatoes. Cover, and bring to a boil. Reduce the heat to a simmer. Cook, covered, for 10 minutes.
3. Using a potato masher, crush tomatoes. Reduce heat to low, and cook, stirring often, for 2 hours or until very thick and similar to the consistency of ketchup.
4. In a blender, puree until smooth. Taste for seasoning, and add more salt if you like.

Tuesday, March 23, 2010

Baking for Passover


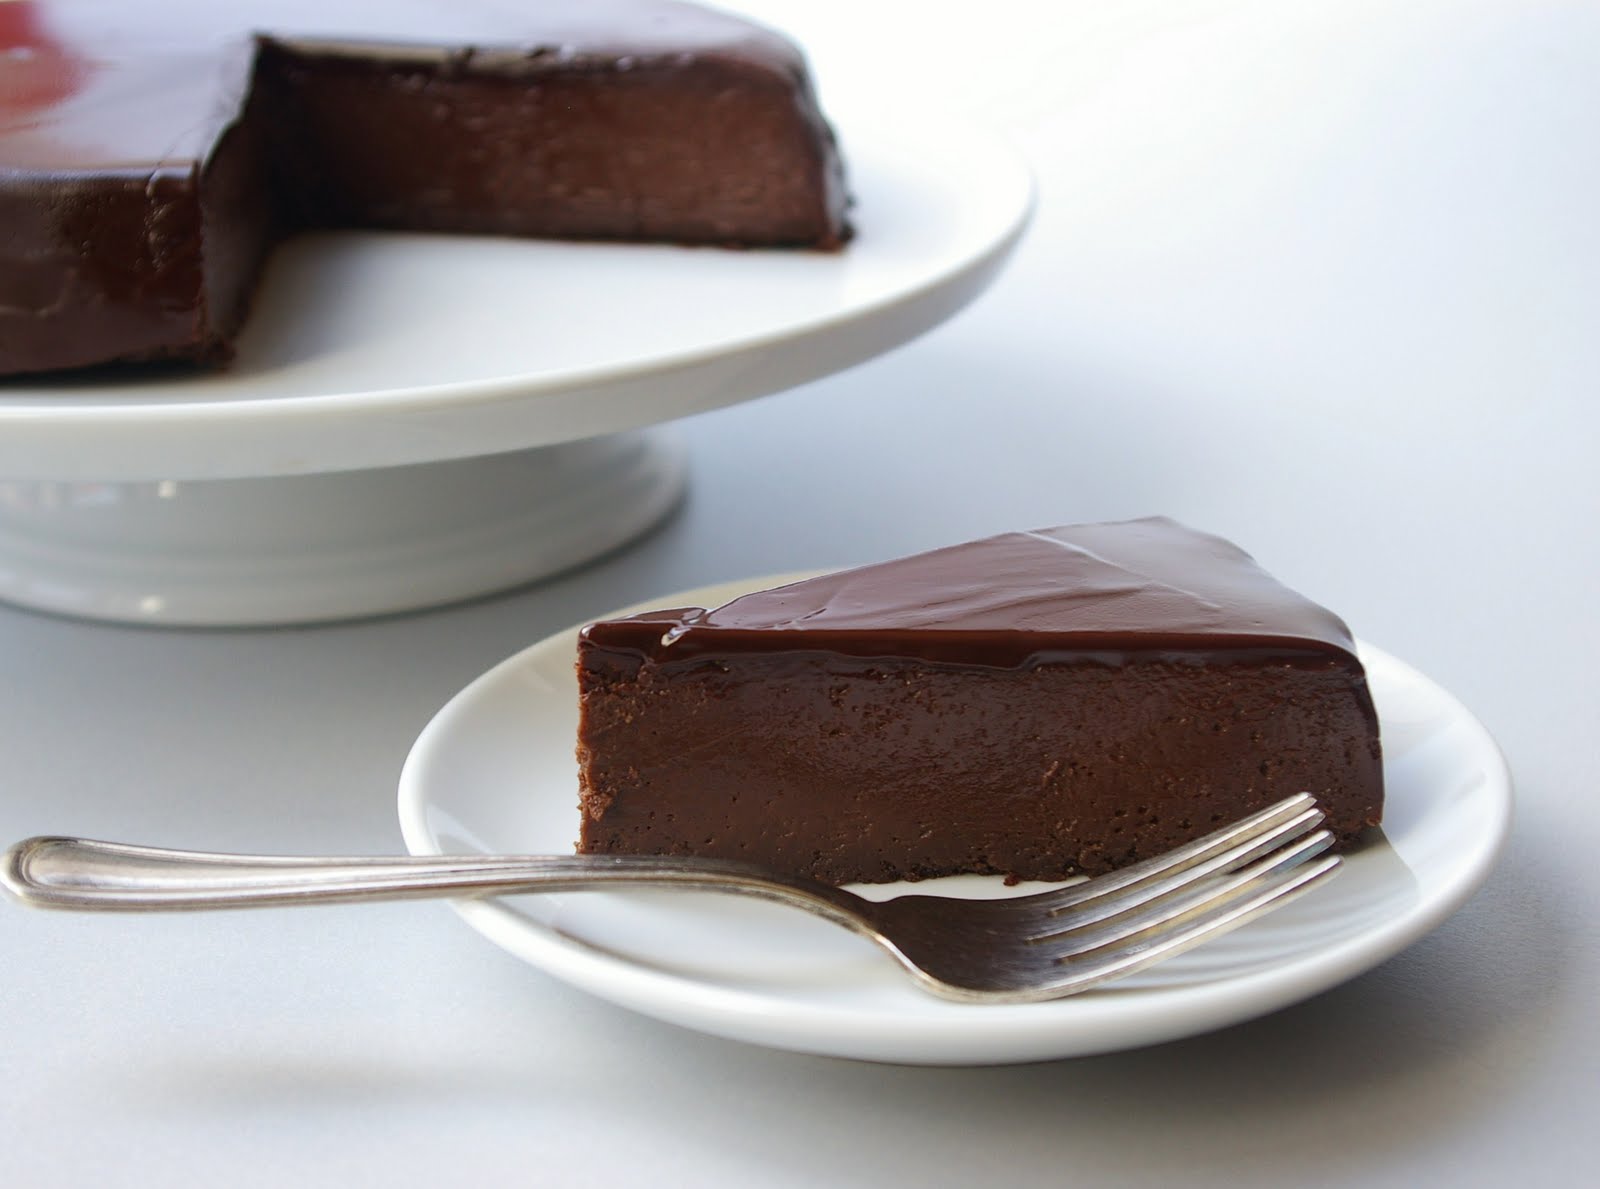
No, I'm not Jewish - despite the fact that the Ben Goodnick who pops up in a Google search is a rabbi -- but I am intrigued by Kosher dietary laws, and I do enjoy a good flourless chocolate cake. What follows are two recipes from the March 24th edition of the Boston Globe. The first is dense and moist -- sinful and dark. The second is light and nutty -- perhaps fleeting and ethereal. Both are delicious, and both are suitable for either Passover or satisfying the sweet tooth of gluten-free friends!

For the Seder, it’s icing on the cake

Many Passover hosts have spent years searching for the perfect flourless chocolate cake. When the holiday begins next Monday night with the first Seder, some good bakers will have found their ultimate holiday confection. If not, keep reading.

Unlike traditional flourless chocolate cakes, which are souffle-like and delicate, this cake is dense and moist. It’s so rich that a sliver will suffice. Serve it at room temperature so the glaze and the interior meld into one. This is actually a classic French torte and it relies heavily on butter. If you cannot serve a cake made with dairy products for dietary reasons, substitute margarine for butter, tablespoon for tablespoon, and omit the salt.

The technique is similar to making a giant brownie. You need only a bowl and a large whisk, and a double boiler (or heatproof bowl set over a saucepan). Bake the cake in a water bath to slowly bring the eggs up to temperature. Rotating and removing the roasting pan from the oven can be tricky procedure. Take your time and make sure it’s secure in your hands. Once the cake has been cooled and inverted onto a wire rack, you can glaze it.

The temperature of the glaze should not be hot to the touch nor should it be stiff. Cool glaze will act more like an icing. Too warm and it will run quickly off the sides of the cake. But if this happens, don’t worry. Scrape the glaze back into a bowl, cool for a few minutes more, and pour again. Chill the finished cake in the refrigerator only until the glaze sets. Then, immediately remove it from the rack and transfer to a platter. Watch the crowd gather round.

Flourless Chocolate Cake

Makes one 9-inch cake

CAKE

Butter (for the pan)
6 ounces bittersweet chocolate, coarsely chopped or 1 cup bittersweet chocolate chips
1 1/4 cups (2 1/2 sticks) unsalted butter, cut up
3/4 cup brewed strong coffee
1 tablespoon vanilla extract
5 eggs plus 2 extra yolks
1 cup sugar
2 teaspoons unsweetened cocoa powder, sifted onto waxed paper
Pinch of salt

1. Set the oven at 325 degrees. Lightly butter a 9-inch layer cake pan, line the bottom with a circle of parchment paper cut to fit in, and butter the paper. Have on hand a roasting pan.

2. In the top of a double boiler over hot but not boiling water, melt the chocolate and butter, stirring until smooth. Stir in the coffee and vanilla. Remove the top of the double boiler and wipe the bottom.

3. In a large bowl, whisk the eggs, extra yolks, and sugar. Slowly whisk in the chocolate mixture. Whisk in cocoa powder and salt.

4. Transfer the batter to the cake pan. Set the cake pan in the roasting pan. Place the roasting pan in the oven. Pour enough warm tap water into the roasting pan to come halfway up the outside of the cake pan.

5. Bake the cake for 45 minutes, rotating from front to back halfway through baking, or until the cake is set. Do not let it cook until the top is hard or the cake may dry out.

6. Remove the cake pan from the water bath and leave to cool; refrigerate overnight.

GLAZE

9 ounces bittersweet chocolate, coarsely chopped or 1 1/2 cups bittersweet chocolate chips
3/4 cup (1 1/2 sticks) unsalted butter, cut up

1. Run a knife around the edge of the cake to loosen it from the pan. Carefully place the pan in a shallow bowl of hot water (hold the pan so the cake doesn’t get wet). Warm the cake for 2 minutes. Wipe the bottom of the pan. Invert it onto a wire rack. Lift off and discard the parchment paper. If the cake does not release, place the pan in the water for another minute and repeat.

2. Set the cake and the wire rack in a rimmed baking sheet. Refrigerate while you prepare the glaze.

3. In the top of a double boiler, melt the chocolate and butter, stirring until smooth. Remove the top of the double boiler and wipe the bottom. Cool the glaze for 5 minutes.

4. Pour the glaze over the cake. With an offset or rubber spatula, smooth any excess glaze over the cake.

5. Refrigerate for 10 minutes or until the glaze sets. Using a metal spatula, loosen the edges of the cake from the wire rack. Transfer to a serving platter. Use a knife dipped in hot water and dried to cut even slices.

Go to the Globe site to see the full recipe for the Italian Chocolate-Almond Torte. (Pictured below.)

Wednesday, February 17, 2010

Ranch Dip


Store-bought salad dressings and dips are chock full of corn syrup, other sugars, and nasty stabilizers. Save yourself the guilt by making your own. Sometimes a salad requires only a squirt of lemon juice and a drizzle of olive oil. Other times, your stomach cries out for a substantial partner which makes getting your daily dose of green veggies seem like a sinful indulgence.

Ranch dip is a party favorite - smothered on hot wings and coating baby carrots. If you already have homemade mayo on hand, this recipe requires less than 5 minutes to throw it all together - making it the perfect addition to your already lengthy party prep list.

If you wish to dress a salad, thin the dip by whisking in a stream of buttermilk until it reaches the desired consistency.

Makes 1 quart

1 1/2 cups mayonnaise
1 1/2 cups creme fraiche or sour cream (see our upcoming post about how to make your own)
6 scallions, minced
1 clove garlic, grated
1 tablespoon minced fresh thyme
Pinch paprika
3 tablespoons vinegar
Salt and pepper, to taste

1. In a large bowl, combine all ingredients. Stir well.
2. Taste for seasoning, add more salt and pepper if you like.

Saturday, February 6, 2010

Ketchup


I could eat ketchup on anything and everything. French fries, in all their salty, greasy greatness, are nothing but a mere vehicle for the sweet, tangy rush of gobs of ketchup. One tiny matchstick requires at least 1/4 cup of the crimson sauce. Burgers should ooze scarlet -- and not just bovine blood. Hot dogs should force the condiment to envelope your chin. Eggs, rice, toast, hell even the most perfectly roasted potato is taken to heavenly heights when dragged through a pool of ketchup.

Addictions are meant to be fed, and if I couldn't get my fix from a corn-syrup laden plastic squeeze bottle, then we certainly had to come up with something close or risk the unbearable symptoms of total withdrawl. This recipe was not an easy one. We cooked up 3 or 4 batches before Ben would even deem it "bloggable", and he still isn't completely satisfied. I, however, took one look at it, dipped in one finger, and then another, savoring the sweet relief, closing my eyes while my veins delivered everything I had been craving. Sometimes, ketchup is so good that it doesn't even need a vehicle.

Makes about 3 cups

1/2 cup honey
1 cup vinegar
2 small yellow onions, minced
1 medium chili pepper, minced
6 cloves garlic, minced
10 roma tomatoes, chopped
1/2 teaspoon paprika
2 whole cloves
1/2 inch piece of ginger, peeled and minced
Salt and pepper, to taste

1. In a flameproof casserole, combine honey, vinegar, onion, chili, and garlic. Bring to a boil over high heat. Reduce heat to medium, and simmer for about 5 minutes, or until it starts to thicken. The bubbles will come slower and be larger.
2. Stir in tomatoes, paprika, cloves, ginger, and salt and pepper. Cover with a lid, and simmer for 10 minutes, stirring occasionally.
3. Remove the lid. Smash the tomatoes with a potato masher until a chunky salsa-like puree forms. Simmer for an additional 2 hours and 15 minutes, stirring occasionally. If you have a splatter screen, it will come in handy during this stage of the cooking.
5. Transfer the contents of the pot to a blender. (You may want to do this step in batches. Hot items in the blender tend to expand and splash upwards. Cover with a lid, leaving the center open to release steam. Hold a towel loosely over the center hole.) Blend for at least 3 minutes on high, or until the ketchup is smooth.
6. Store in an air-tight container in the fridge until the next time you're jonesing for a burger.

Friday, January 29, 2010

Celery Root Remoulade


Homemade mayonnaise, while it may seem like a ridiculous concept, is far better than its store-bought counterpart. When all is said and done, it really only adds an extra 10 minutes to prep time. Our version uses a cooked egg -- traditional recipes use raw -- so that it is safe for pregnant diners or anyone else concerned about the consumption of raw eggs. The addition of water keeps the white bright and lends an extra fluff to the final product. This mayo is unadorned, best used as a base for sauces and other dishes. If it seems like too much of a pain in the butt to you, feel free to substitute your favorite brand when making the remoulade below.

Laying in bed last week, I stumbled across Molly Wizenberg's piece on celery root in Bon Appetit magazine. Firmly attached to some craving center in my brain, I just had to have celery root remoulade. The dish is quite simple, with the only key being the draining of the celery root. If you don't squeeze hard enough, the end result will be loose and watery. Think of CRR as an elegant coleslaw, served in the winter months as a teaser for the barbecues to come later in the year. I enjoy it most with roast chicken and deeply caramelized potatoes. The next day, rub two slices of toast with garlic, chop a few anchovies, and layer the remoulade with leftover chicken. The sandwich might even be tastier than the previous night's dinner.

Mayonnaise

Makes approx. 1 quart

1 egg, poached
2 tablespoons vinegar
4 tablespoons water
1 teaspoon salt
Pinch paprika
3 cups canola oil

1. In a food processor, combine egg, vinegar, water, salt, and paprika. Run the machine for two minutes.
2. With the machine still running, slowly drizzle in oil. Stop the machine. Taste for seasoning, and add more salt and paprika if you like.
3. Store in the fridge, covered. It will last for at least a week.

Celery Root Remoulade

Makes approx. 1 quart

1 pound celery root, peeled and shredded
1 teaspoon salt
1 large shallot, minced
6 tablespoons mayo (from above recipe)
2 tablespoons vinegar
1 tablespoon mustard (we will be posting a recipe for this once we have perfected the proportions)
1/4 cup chopped parsley

1. In a large bowl, combine shredded celery root and salt. Let stand for 1 hour.
2. Transfer celery root to a colander placed in the sink. Rinse celery root. Using your hands, wring out excess liquid.
3. In a clean bowl, combine celery root, shallot, mayo, vinegar, mustard, and parsley. Stir well. Taste for seasoning, and add more salt, if you like.

Thursday, January 21, 2010

Homemade Yogurt


Making yogurt at home is incredibly easy and does not require much specialized equipment. However, as most fermentations go, it is a somewhat lengthy project. If you have a yogurt maker, feel free to use it. If not, try this method. A hot water bottle can be used in place of the heating pad. The only important factor is that the milk must remain at a temperature around 110 degrees for 8 hours or so. The desired thickness is up to you. Strain until it reaches a consistency of your liking. We used a dollop of Fage Greek yogurt to start our yogurt, but in the future, we will not be using a commercially produced starter. With every batch made, we will set aside enough to begin the next batch.

Once the process is finished, you may use it as a spread (IE. on a smoked salmon sandwich), as the base for dips, sauces, and dressings, or as a simple breakfast. For a relatively unprocessed granola recipe, check out this link to the Boston Globe. A recipe that I have made many times, it was contributed by my predecessor, the former pastry chef at Flour Bakery and Cafe and the current owner of Ula Cafe, Korinn Koslofsky.

1 half gallon skim milk
2 heaping tablespoons yogurt (as a starter)

1. In a large bowl, set over a large pot of simmering water, heat to milk to 185 degrees, stirring often.
2. Remove the bowl from pot and cool, stirring, until the milk reaches 110 degrees.
3. Whisk in yogurt.
4. Pour mixture into a non-reactive container (like glass or stainless steel). Cover the opening of the container with cheesecloth, butcher paper, or a coffee filter. Secure with a rubber band.
5. Place container inside a cooler, and wrap container with a heating pad. Place lid on cooler. Turn on heating pad in order to maintain a temperature of 110 degrees inside the cooler for 8-10 hours. We set our heating pad on medium, but you will have to experiment with your own.
6. Chill yogurt in refrigerator overnight. At this stage, you may consume the yogurt, but we prefer a thicker style.
7. Place yogurt in cheesecloth or a very fine mesh sieve. Wrap the yogurt inside the cloth, and suspend it over a container in the refrigerator. Allow the yogurt to drain overnight.
8. Check consistency of yogurt. If it is too stiff for your liking, stir in some of the liquid that collected in the container.